If you've got a lot of products on an event, updating or removing them one at a time can be slow. The Products page lets you select several products at once and edit, delete, or move them together, or update your whole product list in one go using a spreadsheet.
Step 1: Open the Products page
- Either go to Admin > Events or to Admin > Product Groups
- Locate the event you want to manage
- Select Tickets/Products from the Manage menu
Step 2: Select products one by one
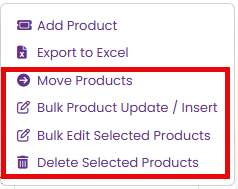
Tick the checkbox next to each product you want to work with. As soon as one is selected, the bulk actions appear in the Manage menu.
Step 3: Or select products all at once
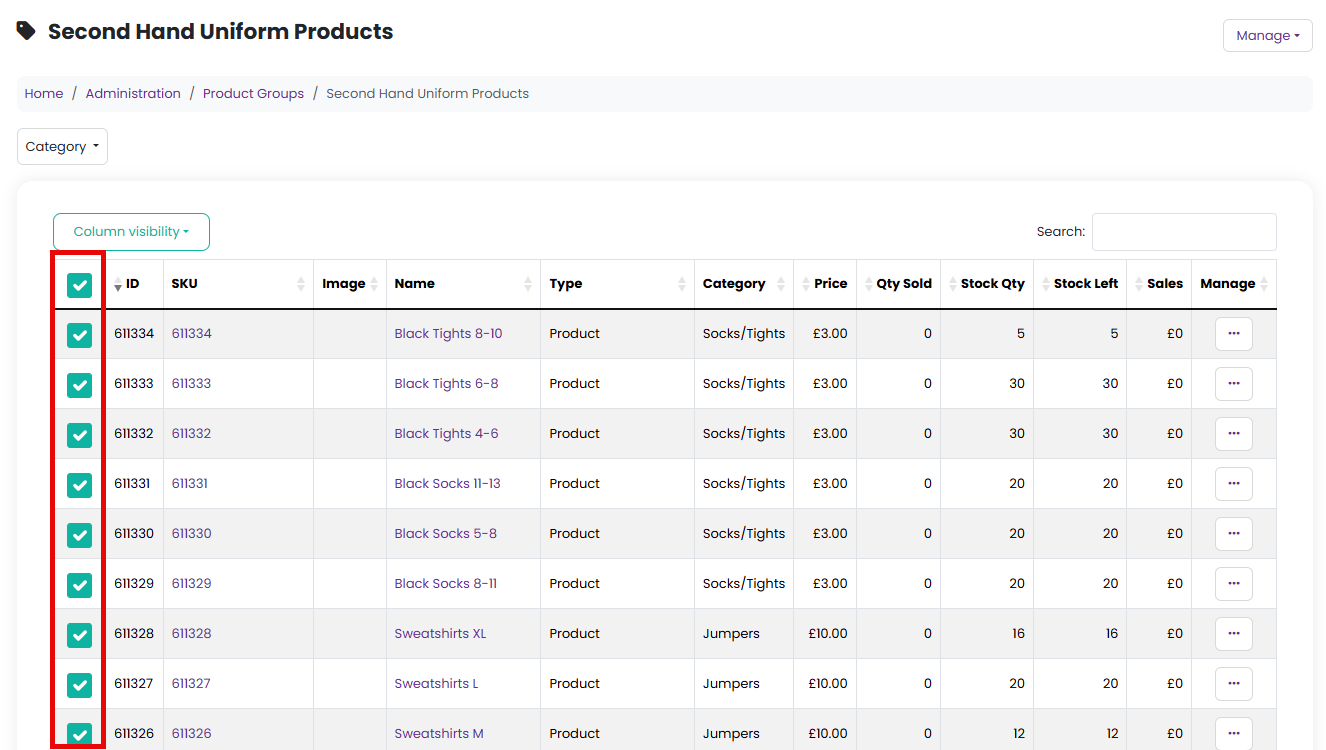
Tick the checkbox in the table header to select every product currently listed on the page in one go. Untick it to clear the selection.
Step 4: Bulk edit the selected products
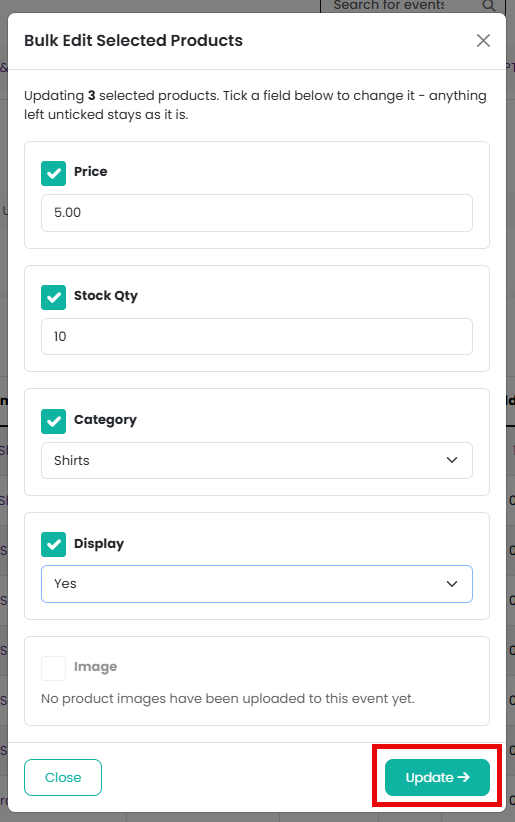
With one or more products selected, open the Manage menu and choose Bulk Edit Selected Products. Tick a field to change it, anything left unticked stays as it is:
- Price
- Stock Qty
- Category (choose "Uncategorised" to remove them from a category)
- Display (Yes/No)
- Image (choose from images already uploaded to products on this event)
Select Update to apply the changes to every selected product.
Step 5: Delete selected products
With two or more products selected, open the Manage menu and choose Delete Selected Products. Confirm to delete them all at once.
Products with completed sales can't be deleted. A product that still has variants can't be deleted either. If you remove its variants first from the Variants page, the product can then be deleted as normal.
Step 6: Move products to another event
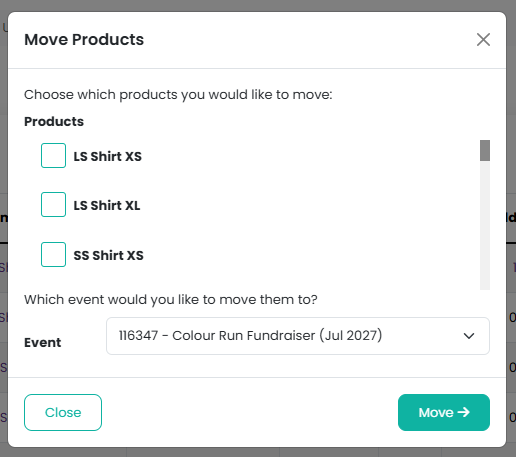
Open the Manage menu and choose Move Products. Tick the products you'd like to move, choose the event you want to move them to, and confirm. Not every product type is eligible to move between events.
Step 7: Bulk update or add products via spreadsheet
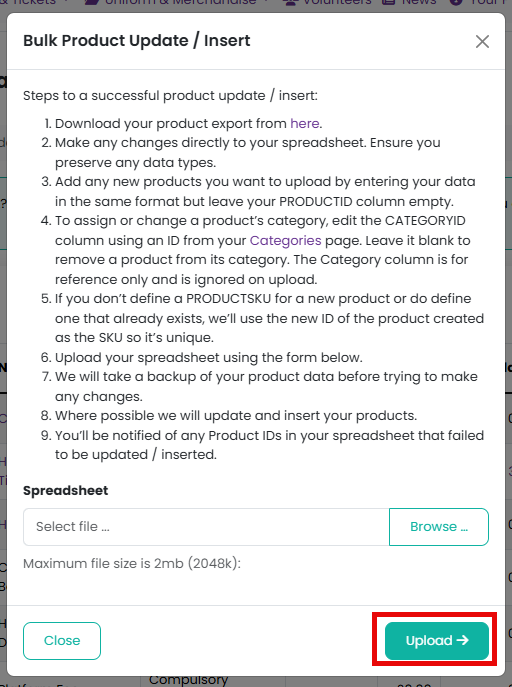
To make changes across your whole product list at once, or add a batch of new products, open the Manage menu and choose Bulk Product Update / Insert:
- Download your product export from the link in the modal
- Make any changes directly in the spreadsheet, keeping the existing data types
- To add new products, enter them in the same format but leave the PRODUCTID column empty
- To assign or change a product's category, edit the CATEGORYID column using an ID from your Categories page. Leave it blank to remove a product from its category. The Category column itself is for reference only and is ignored on upload
- If you don't set a PRODUCTSKU for a new product, or you set one that's already in use, we'll use the new product's ID as its SKU instead so it stays unique
- Upload the spreadsheet using the form in the modal
We take a backup of your product data before making any changes, then update and insert products where possible. You'll be told about any rows that failed to be updated or inserted.
A few things to know
- Bulk edit works with a single product selected, but bulk delete needs at least two.
- Only products you have access to on this event can be changed, deleted, or moved.
- Deleted products are never removed from past orders or reports, they're just hidden from the event going forward.
Related reading
Was this article helpful?
That’s Great!
Thank you for your feedback
Sorry! We couldn't be helpful
Thank you for your feedback
Feedback sent
We appreciate your effort and will try to fix the article