Setting up takes a few minutes and is best done in order, because each step depends on the one before it.
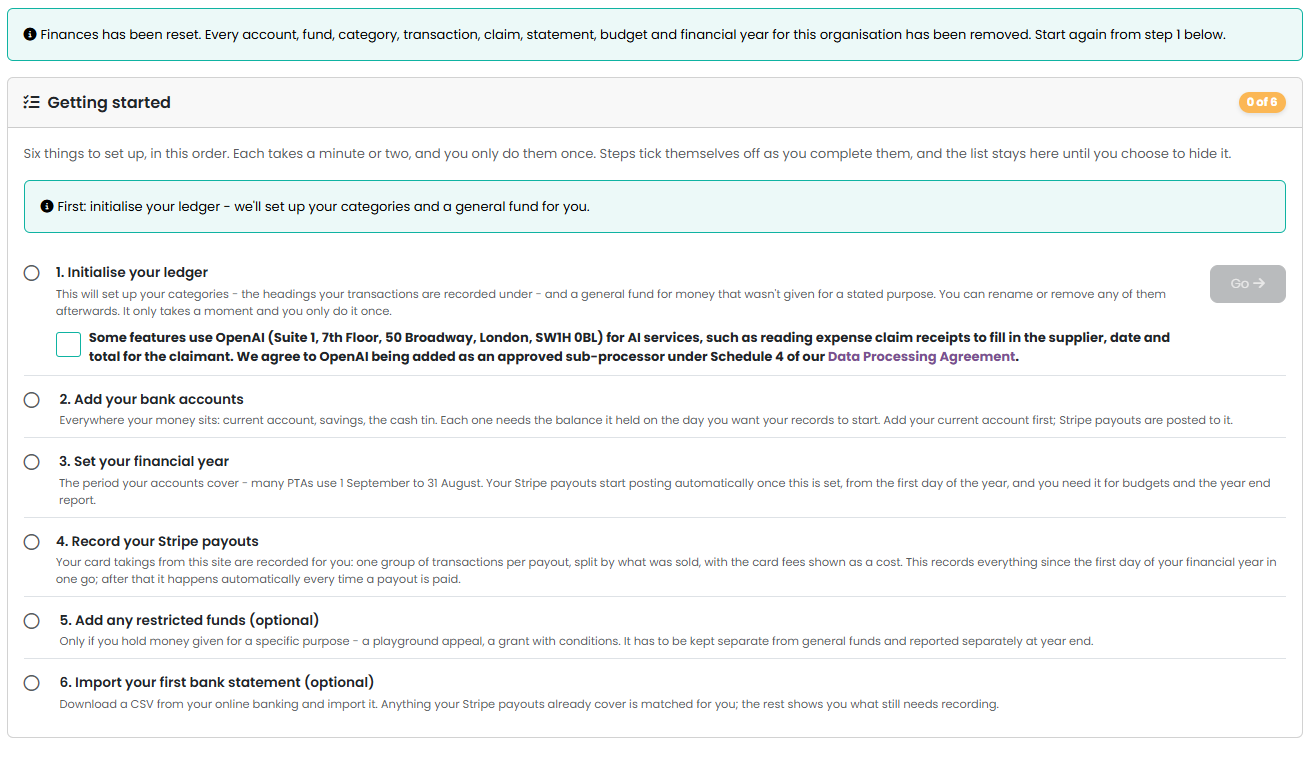
The Finances > Overview page shows a Getting started checklist of six steps that walks you through them, offers Go on whichever is next, and ticks each one off as you go. Until step 1 is done, the other Finances pages send you back to the Overview.
Step 1: Initialise your ledger
Choose Go on step 1. This sets up your categories, the headings your transactions are recorded under, and a general fund for money that was not given for a stated purpose. You can rename or remove any of them afterwards. You are brought straight back to the Overview with step 1 ticked and step 2 ready.
If your Data Processing Agreement was signed before 29 September 2026 there is a box to tick first. Expense claim receipts are read by OpenAI to fill in the supplier, date and total, which makes OpenAI a sub-processor of your data, and only your organisation can approve that. Ticking the box adds OpenAI to Schedule 4 of your agreement and records who approved it and when. Agreements signed from that date already include it, so there is nothing to tick.
Step 2: Add your bank accounts
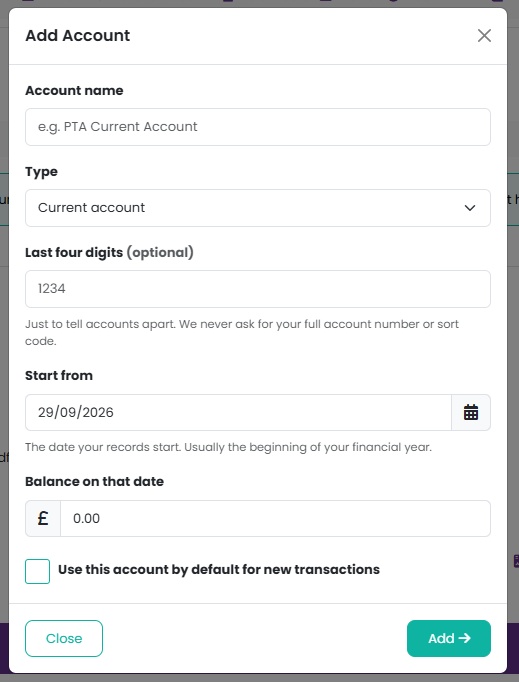
Choose Go and the Add Account form opens. Add every place your money sits: your current account first, then any savings account and a cash account for the float. Each one needs a start date and the balance it held on that date. Stripe payouts are posted to your current account, so make that one the default.
Step 3: Set your financial year
Choose Go and the Add Financial Year form opens. Many PTAs follow the school year, 1 September to 31 August, but use whatever your constitution says.
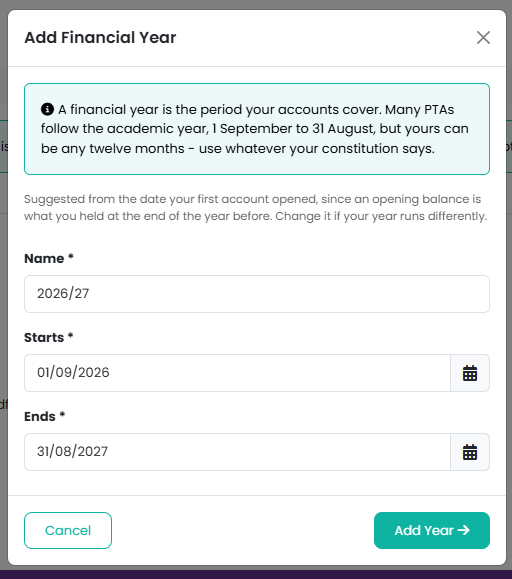
The financial year matters more than it looks: your Stripe payouts are only recorded from its first day, and you need it to set a budget and to produce your year-end accounts. As soon as it is saved we fetch your list of payouts from your card provider, and the Overview tells you how many are waiting.
Step 4: Record your Stripe payouts
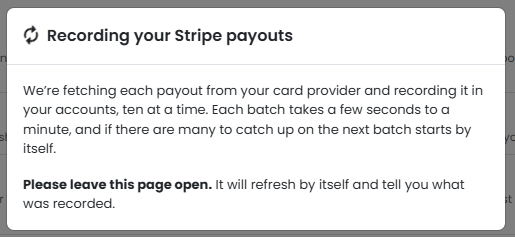
Choose Go. Every Stripe payout paid since the first day of your financial year is recorded in one go, as a group of transactions per payout, split by what was sold, with the card fees shown as a cost. After this, each new payout is recorded automatically when it is paid. If you do not take card payments through the site, choose Skip.
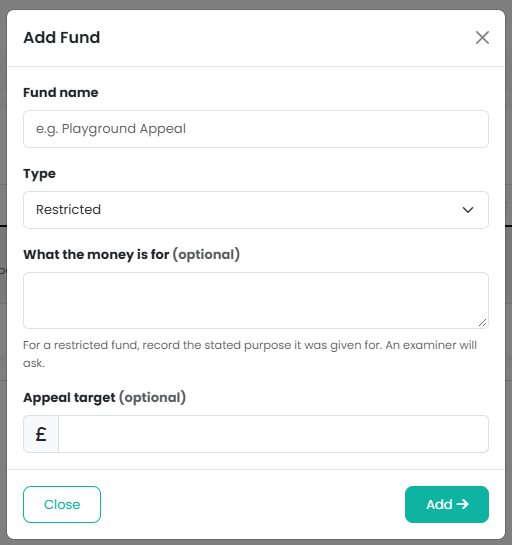
Step 5: Add any restricted funds (optional)
Only if you hold money that was given for a specific purpose, such as a playground appeal or a grant with conditions. Choose Go and the Add Fund form opens with Restricted already selected; you already have a general fund for everything else. If you hold no restricted money, choose Skip.
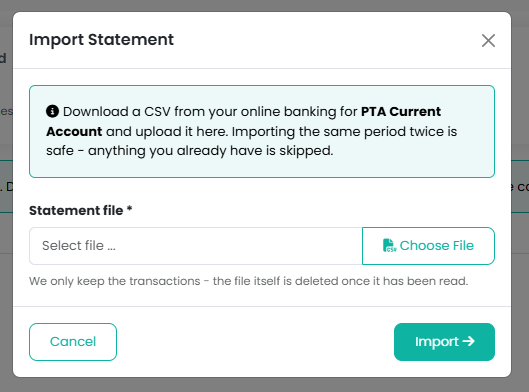
Step 6: Import your first bank statement (optional)
Choose Go and the Import Statement form opens. Download a CSV from your online banking and upload it; the payouts you have just recorded match themselves, and what is left shows you what still needs recording. If you would rather leave reconciling until later, choose Skip.
After the checklist
- Check your categories under Finances > Categories. Rename anything that does not match how your organisation talks about money, and close anything you will not use.
- Start recording. Your card takings post themselves. Record everything else under Finances > Transactions: cash from events, cheques, grants, and what you spend.
- Budgets come later, once you know what your categories are and what your committee has agreed. Go to Finances > Budgets when you are ready.
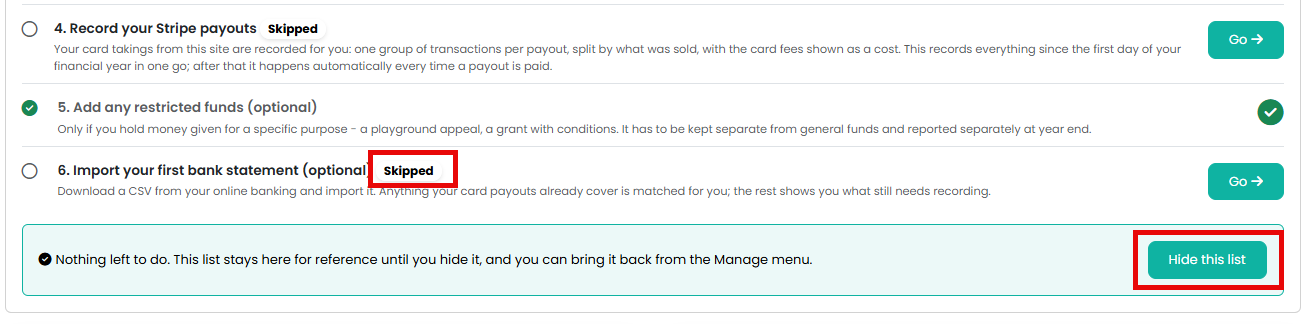
Note: a skipped step still shows on the checklist with a "Skipped" badge, and keeps its Go button, so you can come back to it whenever you like. Once you have done it, the badge is replaced by a tick.
Can I get rid of the checklist?
Yes, once every step is done or skipped. It stays on the Overview until you choose Hide this list. To bring it back, open the Manage menu on the Overview and choose Show Getting Started.
Related reading
- Adding a bank account
- Setting up a financial year
- How do my card takings get into my accounts?
- What are funds and which type should I choose?
Was this article helpful?
That’s Great!
Thank you for your feedback
Sorry! We couldn't be helpful
Thank you for your feedback
Feedback sent
We appreciate your effort and will try to fix the article