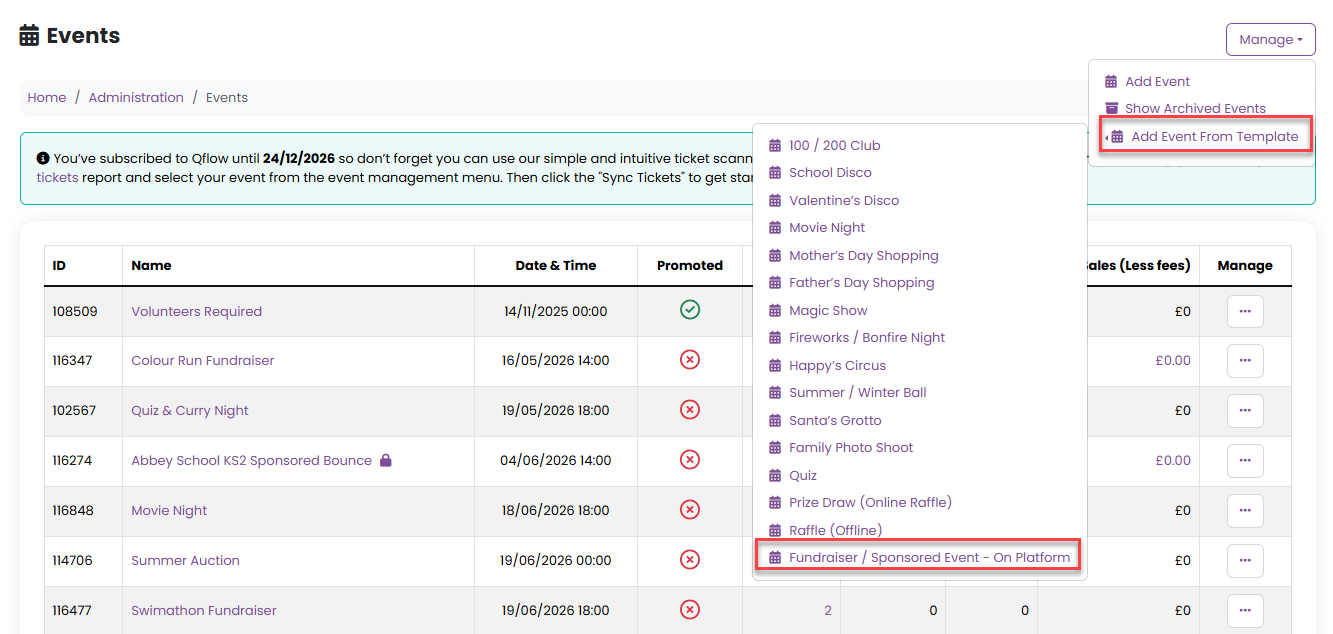
The only way to add a Fundraiser or Sponsored Event on your website is by using the event template.
- Navigate to Admin > Events.
- Select Manage > Add Event from Template.
- Choose Fundraiser / Sponsored Event - on Platform from the dropdown list.
Using the Event Template Wizard
The Event Template Wizard guides you through four simple steps to set up your event:
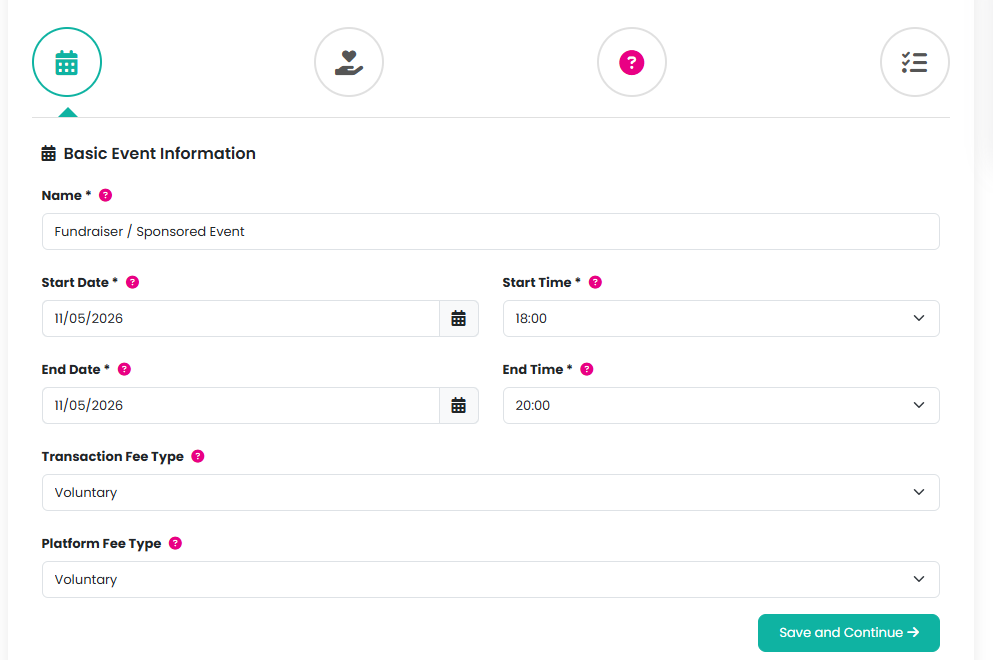
1. Basic Event Information
Key details such as the event name, dates, times, and fee types are pre-populated for you, but can be edited as necessary.
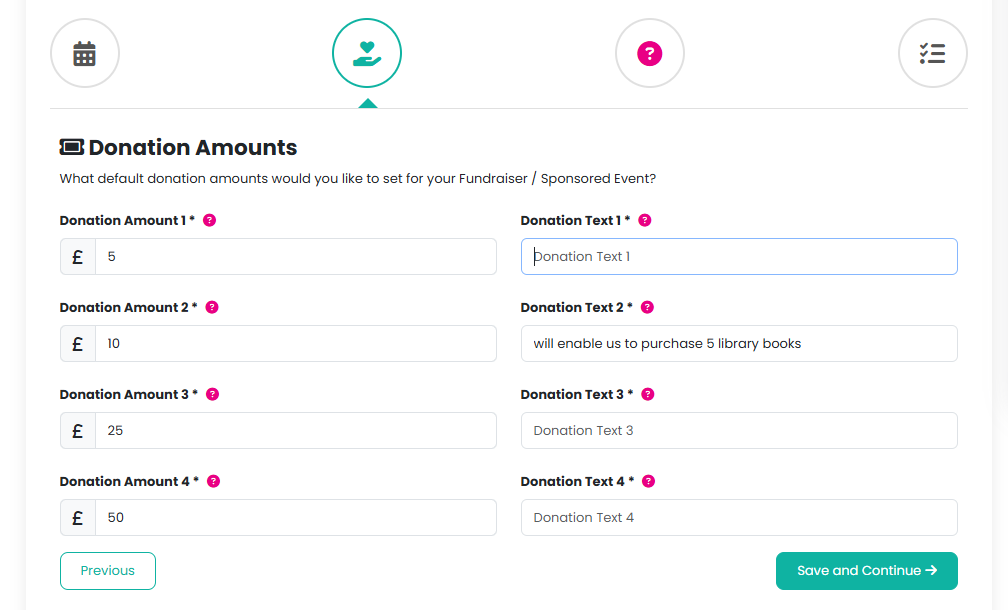
2. Donation amounts and text
Set the default donations amounts for your Fundraiser/Sponsored Event. An optional amount box will also be created. You can include donation text to inform your community what this amount will help contribute towards. For example, will enable us to purchase 5 library books.
Example text displayed to your community on the donation form will then be £10.00 will enable us to purchase 5 library books
Please don't enter the amount first as this is done automatically on the donation form.
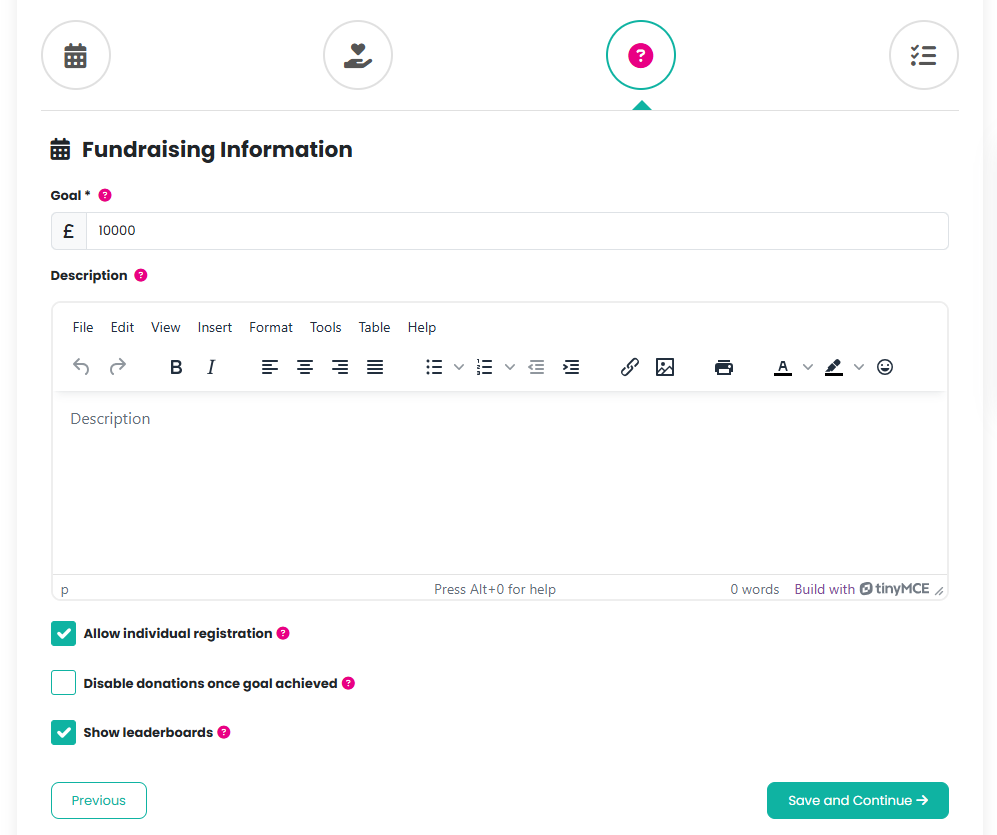
3. Fundraising Information
Enter the goal amount you are looking to achieve and a description of the event.
Here you can check if you would like to allow individuals to register and have a unique fundraising link and QR code to share with family and friends. The amount raised will then be attributed to that individual. Please note that if it is not added at this time, it can be added manually later. Click here to learn more about Individual Fundraising/Sponsored Event Registration.
You can also check if you would like to disable donations once the goals has been achieved and also check if you would like leaderboards to show for class or group fundraising.
4. Volunteers
If applicable, specify the number of volunteers needed to help run the event.

Finalising Your Event
Once you have completed all steps in the wizard, click Create Template Event to add the event to your website.
To make any changes or upload an event image, click on the event name or select Edit from the Manage menu.

Sales start and end dates and purge data dates have been automatically created but can be amended here if necessary.
You can also amend your Fundraising Goal and check/uncheck the following checkboxes:

Three products have also been automatically created:
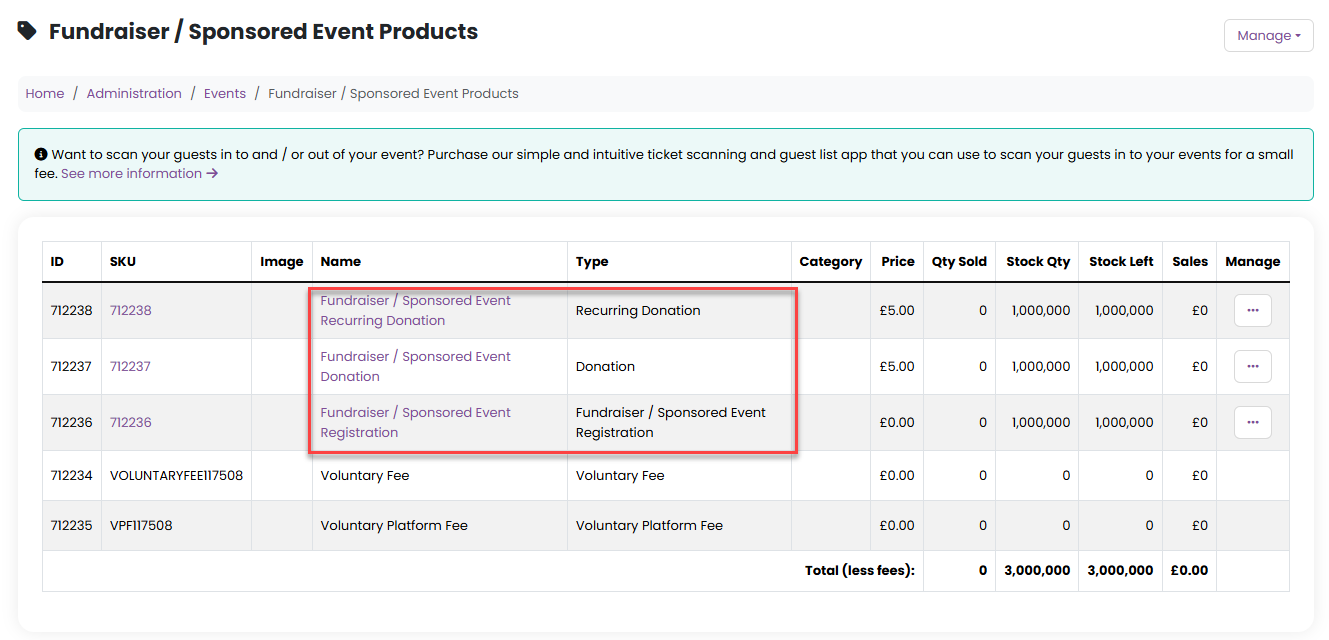
These can be viewed and edited by selecting Tickets/Products from the event management menu.
The event will then show in your Home/Shop page:

When your customer clicks the event name to view it, they can use the Donate Now button to make a one-off or recurring donations:

The Fundraiser Registration will also be visible here (if this option has been checked):

Product questions will automatically be created to allow your recurring and one-off donation customers to leave a message about their donation, show or hide their name and show or hide their donation amount during the process.
Changing the Booking Label to Fundraisers Name for each of the Donation products means this will appear during the checkout process:

The amount donated will automatically be shown on your Fundraiser total (recurring donations will also be automatically be added) by the amount raised per class/group:

By clicking on Leaderboard, the results per class/group will be displayed:

And the Supporter/Donation information will then be shown on the events page:

Was this article helpful?
That’s Great!
Thank you for your feedback
Sorry! We couldn't be helpful
Thank you for your feedback
Feedback sent
We appreciate your effort and will try to fix the article